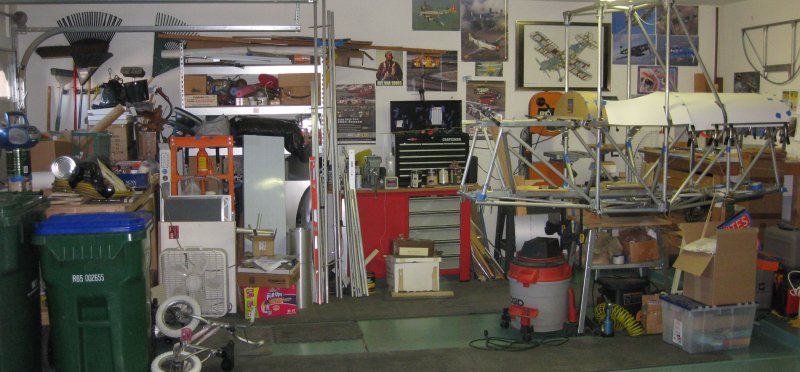
Sherwood Ranger - Fuselage - 10
*This web site is NOT owned or managed by G-TLAC. G-TLAC is not responsible for the content unless explicitly stated. See Disclaimer.
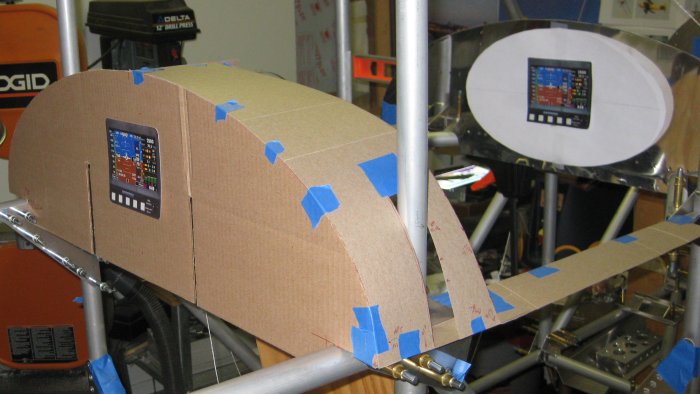
1/19/13 - fuselage top
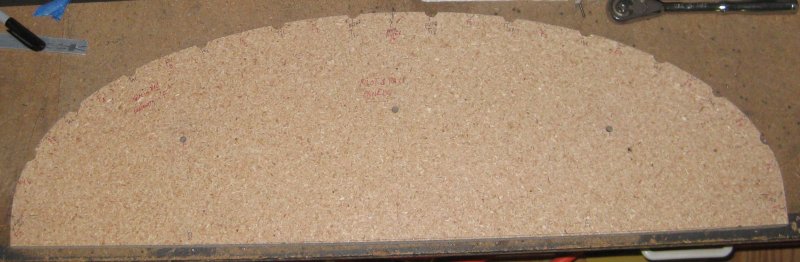
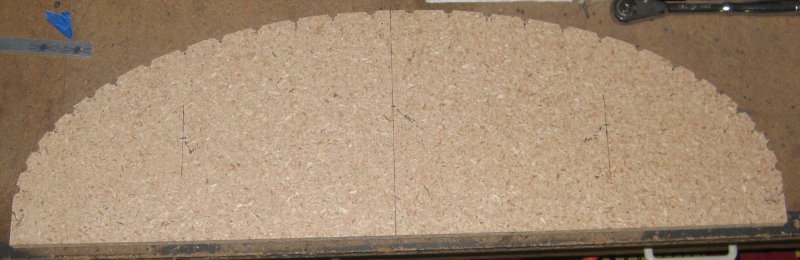
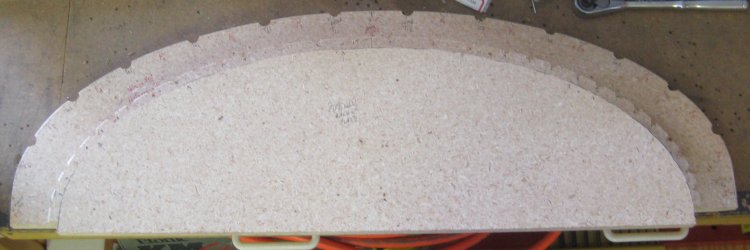
1/2 hr - laid out and cut out the cardboard pattern for the most aft bulkhead. This will be traced onto wood for the form block, and using a washer as a spacer, onto metal for the bulkhead itself. There was some time off in there with a business trip & illness.
1/20/13 - fuselage top
1/2 hr - drilled and cut another form block. Traced the aft bulkhead onto .025 with allowance for the flange, cut it out, and filed and scotchbrited the edge smooth. Brought a folding table into the garage, unrolled the SST, laid out and cut out the upper firewall. Little steps, and there's a million of them.
Was picturing this aft bulkhead - I had sketched in some lightening holes on the pattern. Just realized the seat belts for the pilot's seat need to go through this bulkhead as well - need to figure out where there should be openings for the belts.
1/23/13 - fuselage top
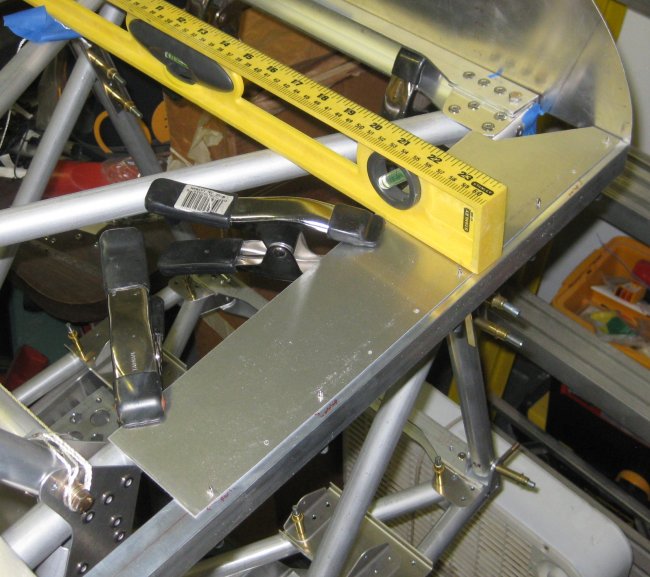
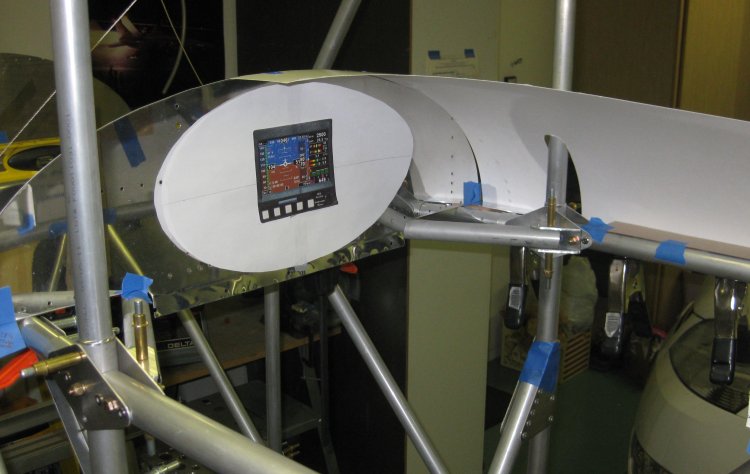
1/2 hr - trying to get something done. Made a pattern for the upper sheet metal just forward of the pilot's panel. It tapers towards the center to line up with the seat back angle of the front seat. This does result in a behind-the-panel volume that is not very deep - will need to carefully consider what instruments are used. This panel station matches the factory-produced station as close as I can scale it from the drawings. Though if needed, I suppose it could move aft maybe an inch or so.
From the side, the forward edge of this top skin follows the angle of the forward seat back. It looks like a pretty thin little box to hold the back-seater's instruments, but with side skins on to form the cockpit perimeter, the overall structure will look a lot more substantial.
1/25/13 - fuselage top
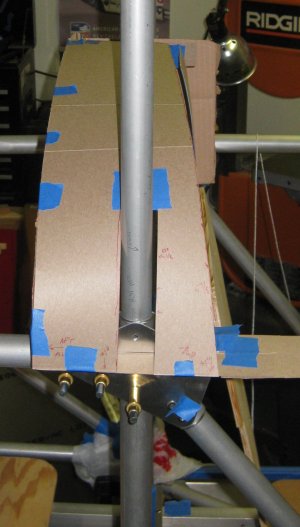
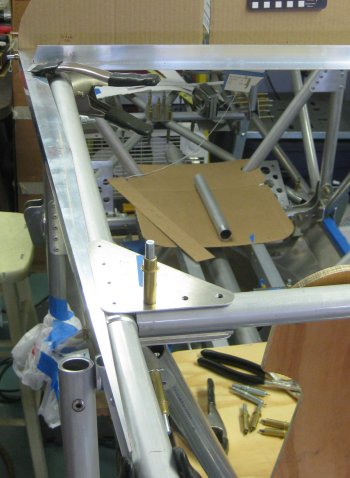
1 1/4 hr - cut up one piece of the upper longeron former stock (1x1x.062 6063). Cut the forward gusset pieces (right & left), filed and scotchbrited the edges. These pieces may be structurally redundant, but they will keep the longeron former from moving fore/aft, with some resistance to being pulled down by the side fabric. The rest of the down-pull resistance will come from being secured to the upper firewall at the front, the forward cockpit panel at the back, and possibly a bracket to the vertical tube about halfway back on this longeron former. Also got some poster boards to use for making patterns for the skins in this area.
Longeron former, side view.
Longeron former between the firewall and front seat panel. These are just patterns for the firewall and panel - the actual parts will have flanges for attaching the skin that will wrap over this structure.
Gusset plate, forward section.
1/27/13 - fuselage top
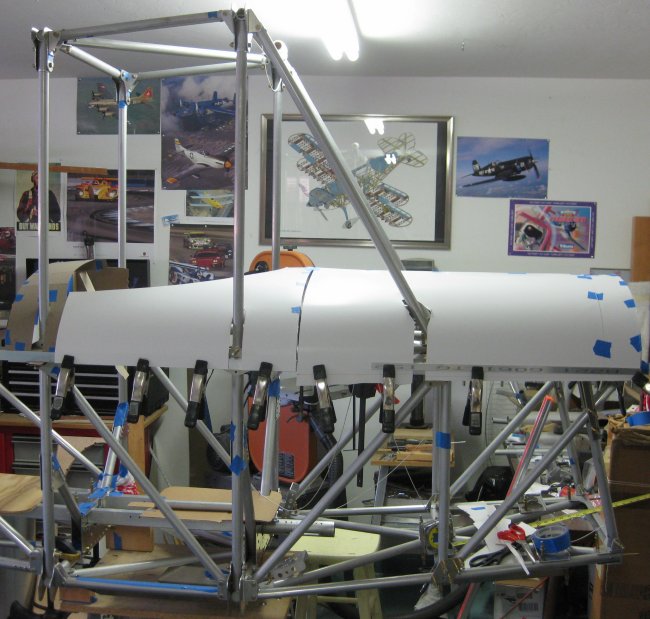
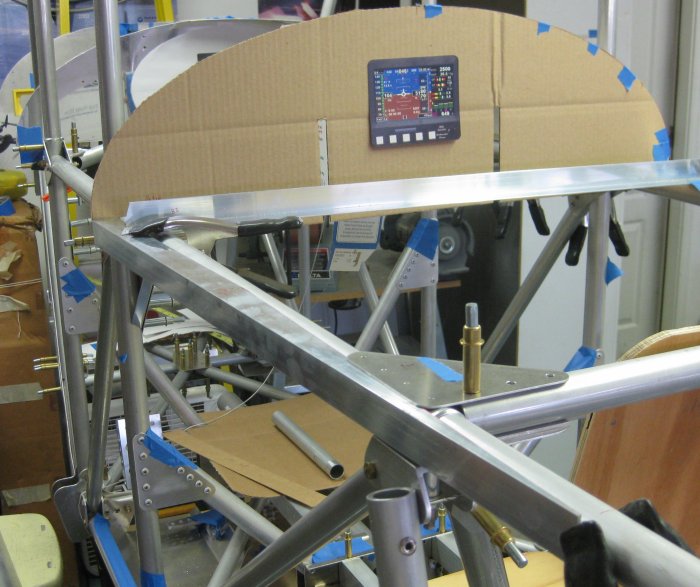
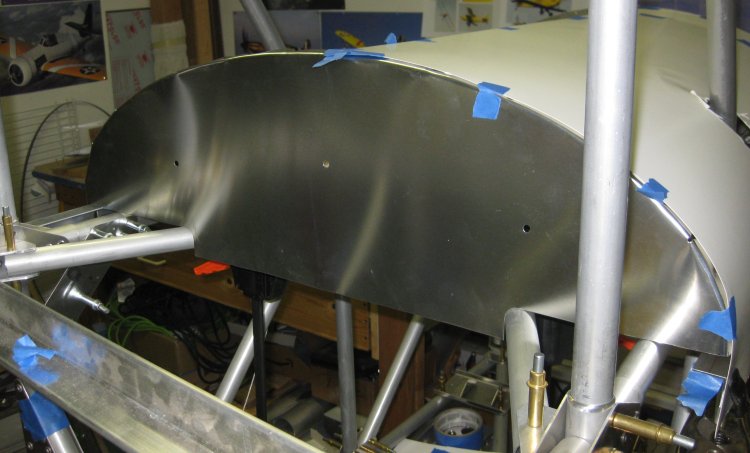
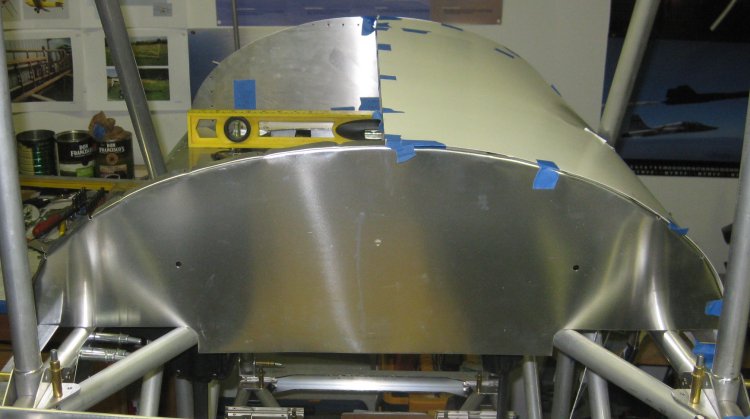
1/2 hr - mocked up another section of the top skin around the front-seater's cockpit. Looks good from the outside, but I might want to see if I can sit in there to see what it feels like before turning it into something more permanent.
Reflections off the polished mock-up panel.
2/1/13 - fuselage top
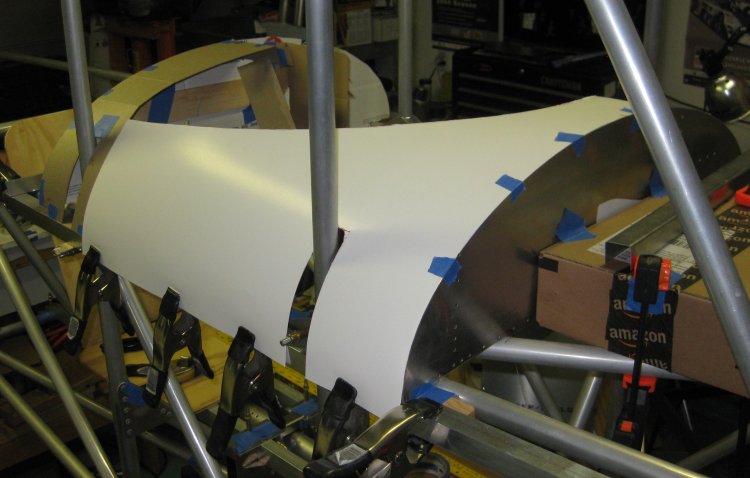
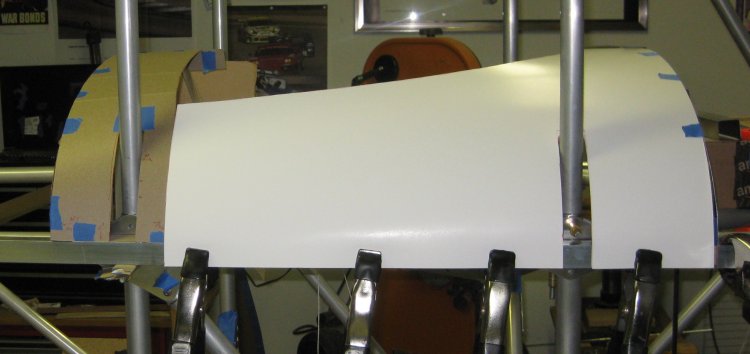
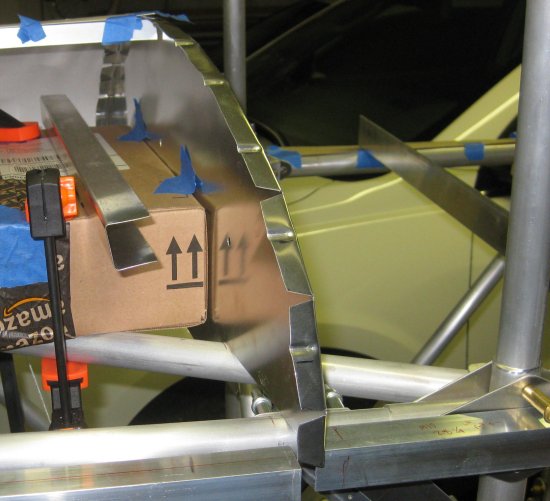
1/2 hr - mocked up the forward section of the top from the firewall to the front seater's panel. Left it a little long along the lower outboard edge because the longeron former isn't locked into exact position.
Forward section - front panel to firewall. The slot for the diagonal tube was just a guess. With the mock-up I can size and locate it more precisely. Bottom edge is long - will re-lay this pattern onto the actual bulkheads to get the true bottom edge location.
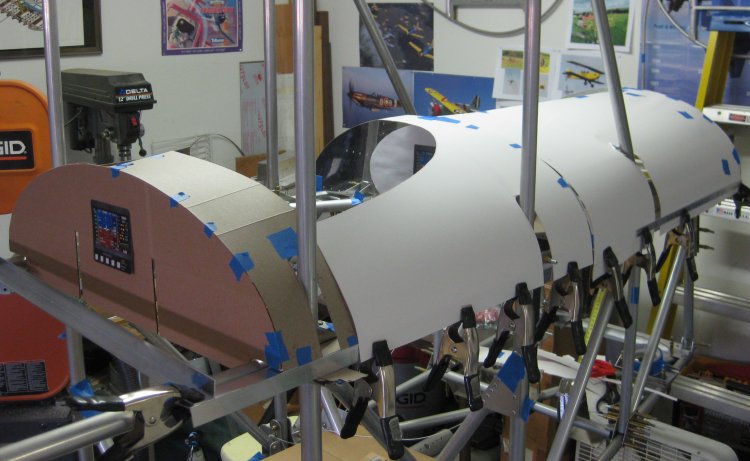
Left side - the pattern ends at the centerline. Fuel tank will be within this volume.
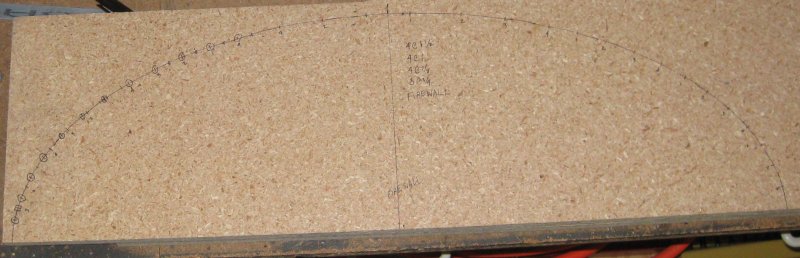
2/2/13 - fuselage top
1/3 hr - cleaned up the work table and marked out the form block for the most aft fuselage top former. There are two other formers to go - front seater's seat back and back seater's seat back - both of these are at an angle. I will try plotting the front seater's seat back because this one is strictly tilt - the greater length at the centerline can be calculated. The back seater's seat back is both tilt and the sides are tapering inwards - more towards the top. So it's not strictly another simple ellipse. An ellipse, yes, but not so simple.
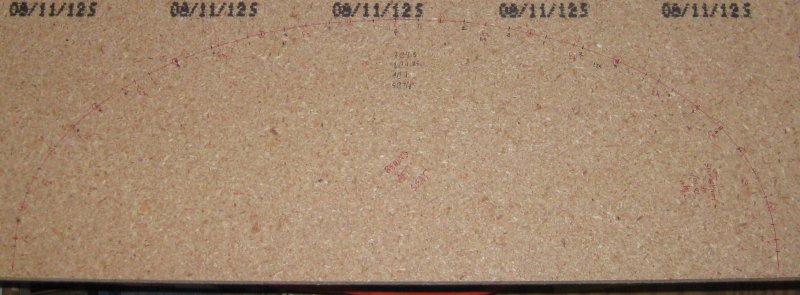
2/7/13 - fuselage top
1/2 hr - cut another couple of pieces of angle to length. Put an angled trim on the aft piece - 15 1/2" from start of cut to full angle removed. Re-measured the center angle pieces and decided to make them 28 1/4". So the fronts are 31 1/2, mids 28 1/4, afts 28 even.
Aft longeron former, left side.
Switched to the left side for this part - no good reason. Need to make both sides.
2/9/13 - fuselage top
1 1/2 hr - cut the rest of the pieces of angle to length. Trimmed the aft right-side piece to taper into the aft longeron. Sighting down it, it looks like it comes in tangent to the curve of the aft longerons, so that should work smoothly. Made up small angle brackets from a piece of 1x1x.125 that already had holes every inch (left over from Sonex project). These will join each end of each angle segment to the panel bulkheads. Drilled the left forward longeron doubler to the gusset plate. It's pretty well to the point where I need to hammer the flanges onto the real panels and firewall and start making real attachments.
2/12/13 - fuselage top
No time - reviewed tools order I would like to place for fluting pliers to form the bulkhead flutes. Decided to try The Yard again - haven't ordered from them in a while. Add in a pair of cleco pliers and some 12 inch drill bits. They offer a soft-faced dead-blow hammer. Will check the local big-box store for a hammer.
2/15/13 - fuselage top
No time - took a while to get a free moment to stop by a store. Bought a hammer locally for more than The Yard hammer. The local store also had the same hammer as The Yard, but the handle did not feel all that great, so went with a more expensive one. Placed order with The Yard for the remainder of the parts.
2/16/13 - EAA Chapter 81
No time - the President of EAA Chapter 81 passed away about 2 weeks ago, so at the meeting today, I offered to take over. No one else volunteered, so the chapter elected me. As if I didn't have enough going on, but I will see what I can do to get things together for the chapter.
2/17/13 - Workshop
1 hour - next major re-arrangement of the workshop is underway. Similar to the last one, I will magically make stuff disappear to create new volumes for the work tables so the fuselage can have more space. Got the area where one of the work tables needs to go cleared out - it's actually going back to where it was when the project started against the house wall of the garage. The other work table will need to get closer to the roll-up door, leaving a more-or-less fuselage-length space all along the work area.
2/19/13 - workshop
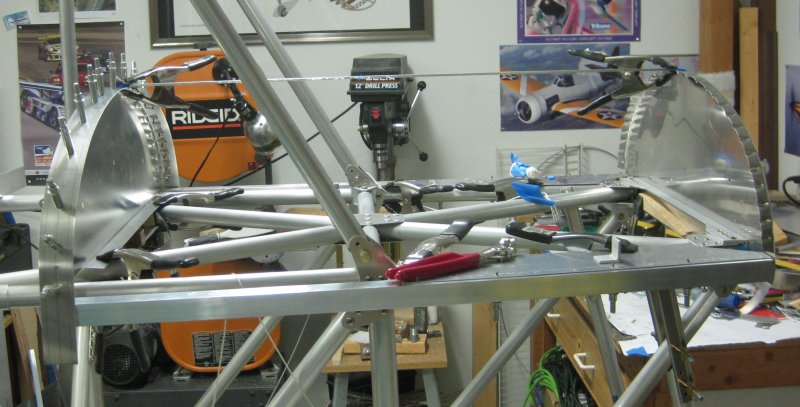
1 1/3 hr - made the big table moves in the workshop area. Of course, that only reveals how much extra stuff was under the table that I took down to make room for one of the tables that I can't take down. Anyway, it's a lot closer to being able to fit the complete fuselage length.
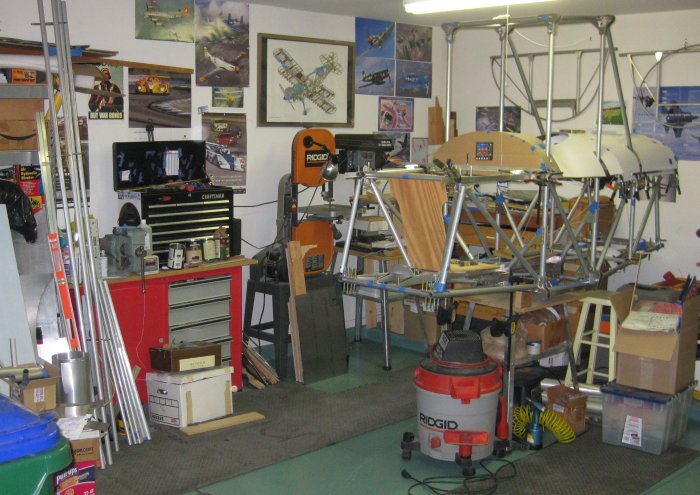
Forward section of the fuselage on this end of the shop.
Space for the tail section of the fuselage on this end of the shop.
Now I have to get to work on filling this space up...
2/20/13 - Forward section
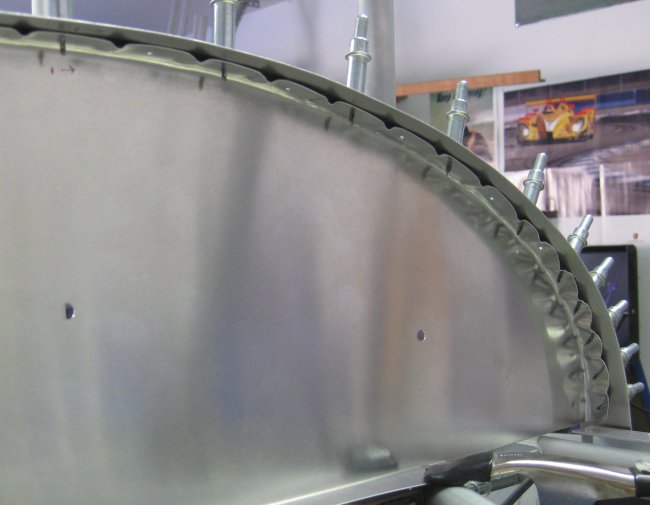
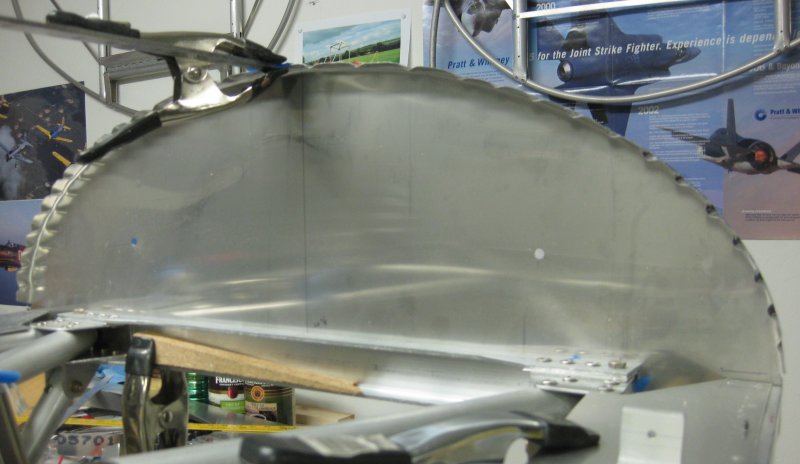
1 hr - tools arrived. Most importantly, a better fluting plier. Drilled the front and back seater's instrument panel form blocks for backing-plate hold-down bolts. Drilled the backing plate for bolts. Positioned the front-seater's panel blank on the form block and drilled through. Bolted it all together and hammered the flange. Not enough flutes down around the curve, but overall it turned out well. Made the cutouts to clear the fuselage tubes and put the panel bulkhead into position.
Looks pretty good to finally have a panel with a structural flange in there.
And it gets kind of ugly with the flutes down around the tighter part of the curve.
From this view, you can better see how ugly that it is. I will try again.
2/21/13 - Forward section
1/2 hr - made up another blank for the front seater's panel bulkhead from .025. The one I hammered out yesterday was .032 - plenty stiff, but more lumpy than I wanted in the flange itself. Will try again with .025 and see if it hammers down smoother.
2/22/13 - Forward section
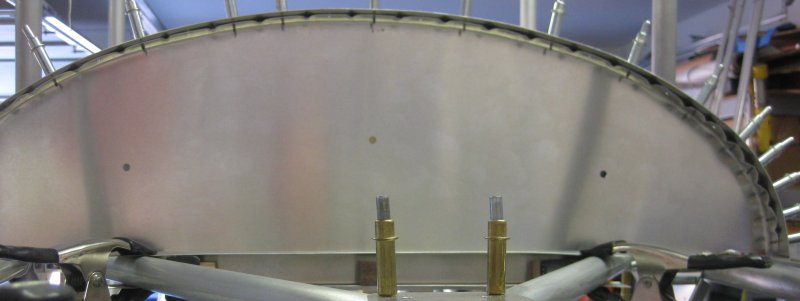
1/2 hr - trimmed the bottom edge of the bulkhead blank to clear fuselage tubes. Trimmed v-notches at 3 locations per side to ease the material gathering around the sharper ends of the curve. Aligned the blank to the form block. Drilled, bolted together. Squeezed the flutes - realized in aligning the blank to the form block that a few of the flute loctations had shifted far enough to not align with the relief notches in the form block. It worked out well enough because I caught it with only a couple of flutes displaced. I think with an .032 stiffening strip riveted to the outer perimeter of the bulkhead that this will work. I had planned to make the others (non instrument panels) from .025 anyway, so this serves as the example for the rest of them.
Second try with .025 stock and some V-cuts.
Showing where the V-cuts were added.
Pretty good-sized panel.
2/23/13 - Forward section
1/2 hr - fitted cross beam at bottom of front-seater's panel. This is a similar part as is called out in the plans - a U-channel of thin stock wrapped around the structural tubes. Started to cut strap stock to wrap around the bulkhead flange.
1/2 hr - finished the first strap, laid out and cut out another. Spring-clamped the strap to the front seater's panel bulkhead. Got me thinking about fastener locations and how to make the panel wrap to the curve better.
2/24/13 - Forward section
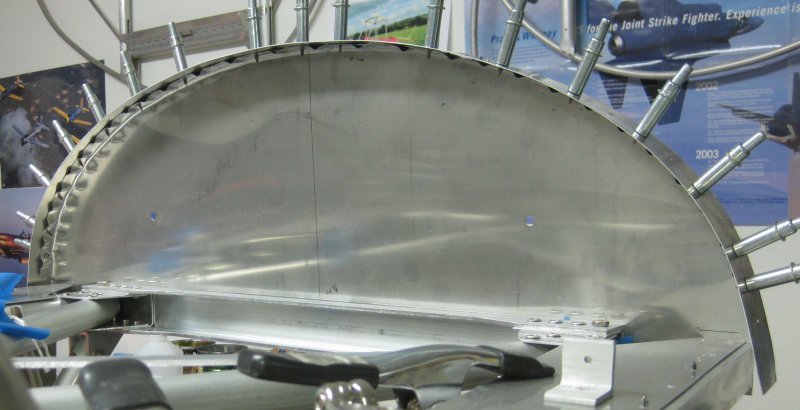
1/2 hr - re-laid out the form blocks to add more flute locations. After looking at how the fasteners are really going to lay out, I decided that the flute locations are not critical for the outer sheet stock fasteners. Given that, I've got more .025 sheet stock. I've got more MDF (form block material). May as well make it how I would want it to be. Should be nice when it's done. Then someone's going to ask for the dimensions to make their own copy, so I'll probably get the dimensions down in a document somewhere.
1/2 hr - drilled the holes that become the flute notches and cut the perimeter of the replacement form block.
Original instrument panel form block. Note spacing of flutes. Drilled with 1/2" dia. drill bit.
Re-made instrument panel form block. Flute spacing much tighter. Drilled with 3/8" dia. drill bit.
Re-drew the firewall form block. Had already made this block with larger flute spacing.
This is the most aft block. Had not cut this one out yet, so just re-spaced the flute locations.
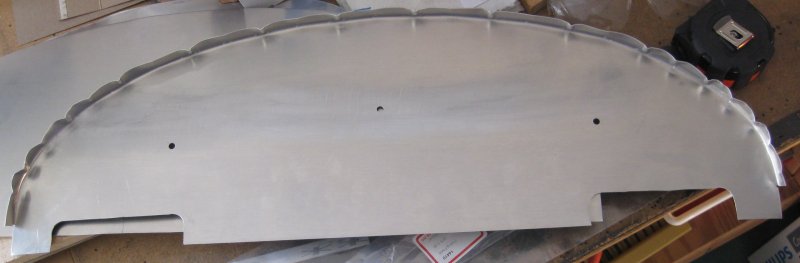
1/2 hr - finished trimming the shape of another panel blank, added the tube clearance cutouts, drilled the blank to the new form block and hammered out another panel. I think it was worth it. No v-cuts, and the higher quantity of flutes works better.
2/25/13 - Forward section
1/2 hr - started drilling the cap strip to the bulkhead.
2/26/13 - Forward section
1/2 hr - finished drilling the cap strip to the bulkhead and drilled the flute locations into the upper firewall form block blank.
Cap strip drilled to the front seater's panel. The spring clamps are holding the cross beam that the panel attaches to.
Detail of the flute spacing.
Panel from the forward side.
2/28/13 - Forward section
1/2 hr - filed smooth the edges of the upper firewall blank and drilled the holes through it for the engine mount bolts. Cut the perimeter of the upper firewall form block. Almost ready for hammering.
Showing the size difference between the instrument panel and the top of the firewall. The size isn't completely true - the instrument panel block is taller than it needs to be. Both parts end up the exact same height - the difference is in width.
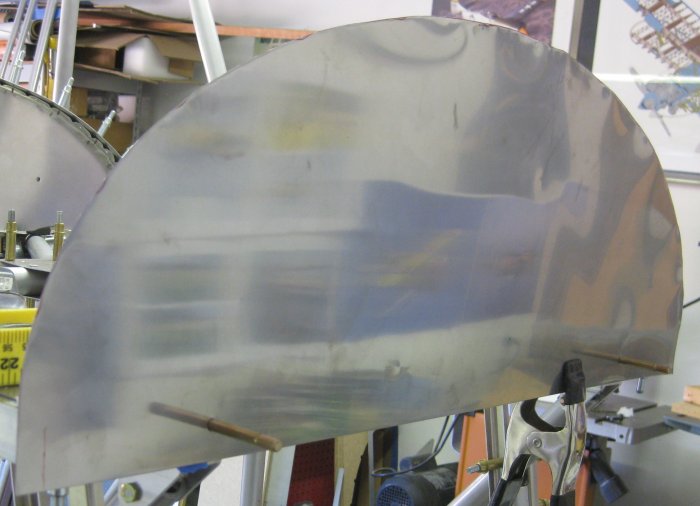
Upper firewall blank in position on the engine mount bolts.

Upper firewall blank from the aft side.
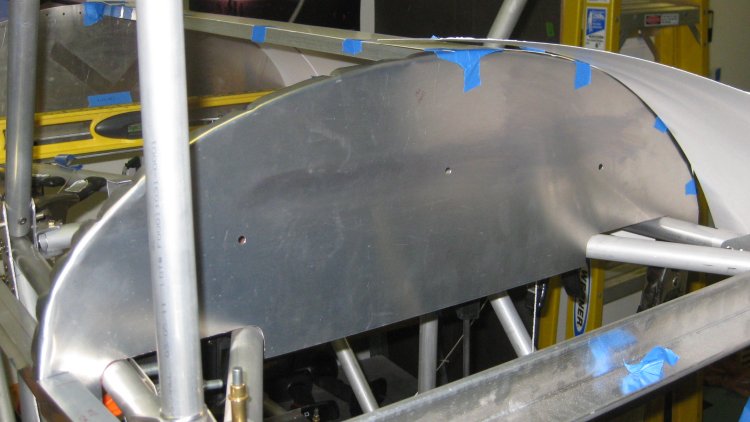
3/1/13 - Forward section
1/2 hr - lined up the upper firewall blank on the form block. Located the amount of flange to be trimmed at the bottom of the blank. Marked corner points for these rectangles to be cut off, marked and drilled #40 and #30 at the corner to provide a stress relief. Trimmed the rectangles and filed the edges.
1/2 hr - located form block backing plate bolt holes and drilled the form block, the firewall blank, and the backing plate. Bolted together. Marked flute locations; squeezed flutes. Hammered flange down. SST hammers really nice - gets more of the way to a 90-degree flange than Aluminum.
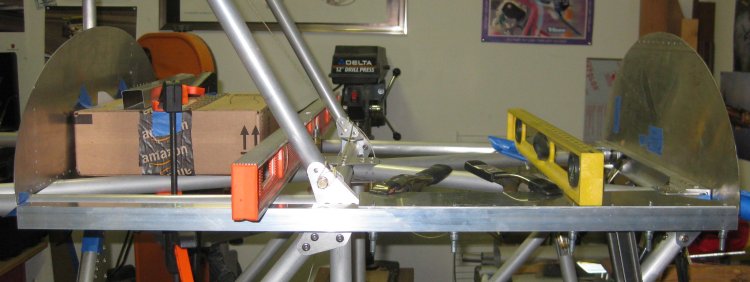
Upper firewall in place with flange hammered.
The two upper fuselage formers with flanges.
3/2/13 - Forward section
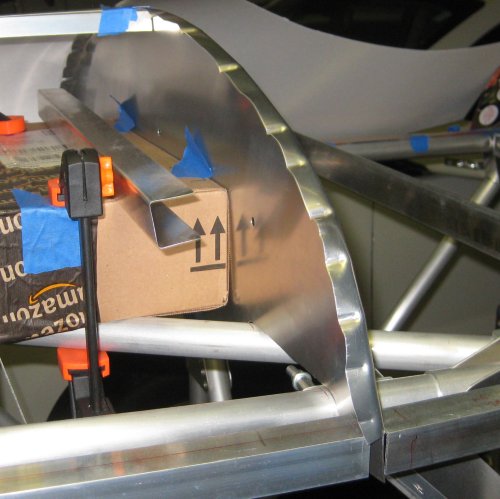
1 1/2 hr - checked the flange on the upper firewall for 90 degrees and tweaked as required to get all of the flange between the flutes to there. On the small flange segments, I use a crescent wrench wrapped with tape to bend the flanges (some use a stick with a slot, but the adjustability of the wrench is useful). Filed & scotchbrited the edges of the cap strip. Marked the fastener lines on the cap strip (centerline + a line 1/4" in from each edge). Marked the centerline of the flange on the firewall part. Clamped the cap strip to the firewall and marked fastner locations (using cleco clamps on every other flange segment, marked flange centers on every other flange segment). Pull the cap strip off, center punch & drill the marked hole locations, then re-clamp the cap strip to the bulkhead, aligning the center of the drilled holes with the centerline of the flange marked earlier. Drill through every other hole location, and install clecoes. Remove the cleco clamps, mark every other (the remaining) hole location; remove the cap strip, center punch and drill the strip; re-cleco the strip to the firewall, drill through the remaining hole locations. Didn't quite finish that last part (a few more hole locations to drill through) because I didn't actually do the above all at once. I only have enough cleco clamps for about half of the strip, so there were more on/off iterations.
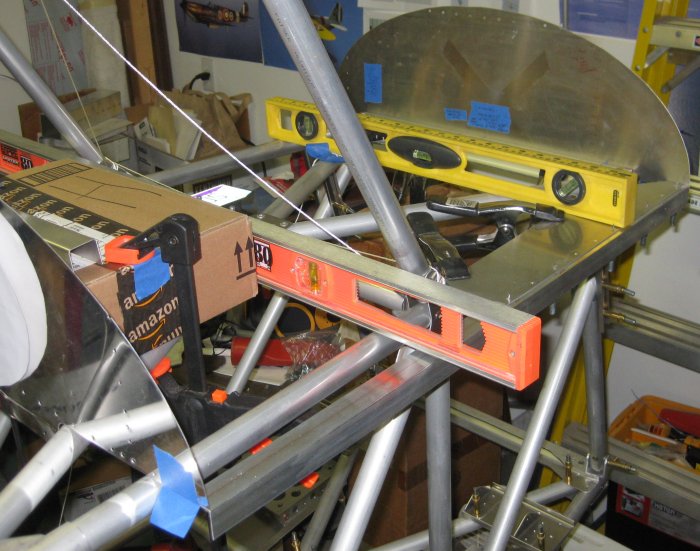
Upper firewall with cap strip clecoed in place. Yes, there are 2 tooling holes. I will fill them with something steel (bolt, rivet, possible wiring pass-through point).
1/2 hr - finished drilling the cap strip for the upper firewall. Measured and trimmed the bottom edge of the front seater's panel to be even with the attachment cross-beam. Laid out a line of fasteners on the panel for the cross beam. Pilot drilled these, then clamped the panel into position and drilled through some of the pilot hole locations.
3/3/13 - Forward section
1/2 hr - drilled the cap strip to the front-seater's panel to 1/8". That's .125, not the .128 of the #30 drill. Some have said countersunk blind rivets pull better when starting with a slightly smaller drilled hole - reason is the hole is expanded in the dimpling process. Deburred both sides of both parts. Used the dimpler-welded-to-vise-grip to form the dimples on the panel flange. Used the c-frame dimpler to hammer the dimples onto the cap strip. Cleaned the ink from both parts. Clecoed back together. Checked my stock of CCC42 rivets - not nearly enough. I thought I had hundreds of these left over from the Sonex build because there was somewhere I used a bunch of protruding-heads instead of countersunk heads (the cowling hinges), but I later must have used a nearly identical amount of countersunk rivets in the engine baffles. So I need to order some more of those.
3/4/13 - Forward section
1/2 hr - found some leftover Sonex channel stock that would have 90 degree bends and roughly 1/2" wide flanges already bent. Squared up the firewall with a temporary brace (made it vertical), and did the same for the front-seater's panel. Did this to measure the distance between the flanges. With that measurement, cut a L segment from the old channel stock. It had protective white plastic on one side which was an absolute bear to peel/scrape off. Spent the next 2 hours or so watching TV with a bowl to collect the scrapings, and scraped the protective stuff off the part.
3/5/13 - Forward section
1/2 hr - cut another angle part from some old Sonex channel. This one, the white plastic covering peeled off pretty easily. Marked a row of fasteners and pilot drilled. This will join the 2 parts together, forming a 1/2" high Z channel to be a stiffener for the sheet that will wrap over the firewall and forward panel bulkheads.
3/9/13 - Forward section
1/2 hr - Drilled the 2 pieces of angle stock to each other. Cleaned up the work table after quickly moving things off the airframe (that tend to collect there) to show a couple of the local EAA chapter members who were over for a chapter board meeting.
3/10/13 - Forward section
1/2 hr - went for it and drilled the longeron doubler web bracket to the upper longeron. It's on there now, for better or worse - my modification to the upper fuselage structure is now going to be a permanent part of the structure.
3/12/13 - Forward section
1/2 hr - Drilled the forward end brackets to the longeron doubler on the left side. This attaches the forward longeron doubler to the firewall. Also drilled through the strap/cap strip forward and aft to secure the longeron doubler. Made up a pattern for a center support bracket.
3/16/13 - Forward section
3/4 hr - made up the aft gusset plates for the forward longeron doublers. Got the one for the left side pilot drilled in position. So other than the aft angle bracket and the mid support bracket (still need to make that one), the LH forward longeron doubler to airframe attachments is all pilot drilled.
3/20/13 - Forward section
1/2 hr - got the RH longeron doubler drilled to the fuselage along the forward gusset plate. There is a lot of adjusting of the clamps and such to get it positioned - not anything to lock it in or guide it really until some of the attachments are drilled through.
4/21/13 - Misc. updates
Been a long month mostly away from this project. Hosted the EAA Chapter 81 monthly meeting in my garage yesterday. Had maybe about 20 people in attendance. That went pretty well. Moved out the cars & bikes and set up a table to put the loose parts on, as well as folding chairs and camp chairs for people to sit on. Got the Sonex sold. That included several weekends of transition flights with the buyer, and they took it off to Prescott on the 10th. Got a car bought, delivered, titled & registered. (Buick links on this site) Still have some fix-ups to do with that car, then I'll get back to the airplane building.
Click to join sherwoodbuilders