Sherwood Ranger - Fuselage - 2
*This web site is NOT owned or managed by G-TLAC. G-TLAC is not responsible for the content unless explicitly stated. See Disclaimer.
11/9/11 - Original plan was for this page to start the forward fuselage box, but the aft and forward frames, much less the central box are taking more days and photos than I thought, so to keep page length reasonable, I'm splitting into this 2nd page at the forward fuselage frame.
11/9/11 - Forward fuselage frame
1 hr - had about done what I can do at this point with the aft fuselage frame - a couple more parts to make and rivets needed to free up some clecoes for starting somewhere else. But got both corner plates/brackets on the upper end of the forward fuselage frame drilled. This one is a little easier because there are no nylon inserts in the tubes - the forward frame features a tube within a tube for the top cross member. Got it all drilled, but not deburred or bolted together. I'm suffering a shortage of AN4-20's. Either I counted wrong, or I mis-ordered, or I misplaced a bag of these. Also have noted a location or two where the bolt length on the figure is incorrect, but I need to double check, as a couple of these figures were revised earlier this year.
11/10/11 - Forward fuselage frame
1 hr - debur and assemble the frame upper corners that I drilled yesterday. Took a little longer than I thought to pull it apart and debur everything, but there's a lot of layers of material up there. Arranged the bolts so only one needs to be pulled out and replaced with the correct length.
11/11/11 - Forward fuselage frame
1/2 hr - drill one side of the lower diagonal and lower center plate to final size. Deburred, and re-clecoed into position.
11/13/11 - Forward fuselage frame
1/4 hr - start drilling the lower gusset plates on the other side. Got to thinking if the center portion between the 2 frames could be worked on ahead of getting/making the angled plates, and realized on the aft frame I put 2 U brackets on the wrong side, possibly because they don't provide a forward side and aft side view of the aft frame - only the view from the forward side. Anyway, it's only bolts to un-bolt, though they are 2-hole brackets so I hope the 2 holes are spaced close enough for them to bolt onto the other side ok. Set up the tripod and timed a photo of me doing some of this stuff.
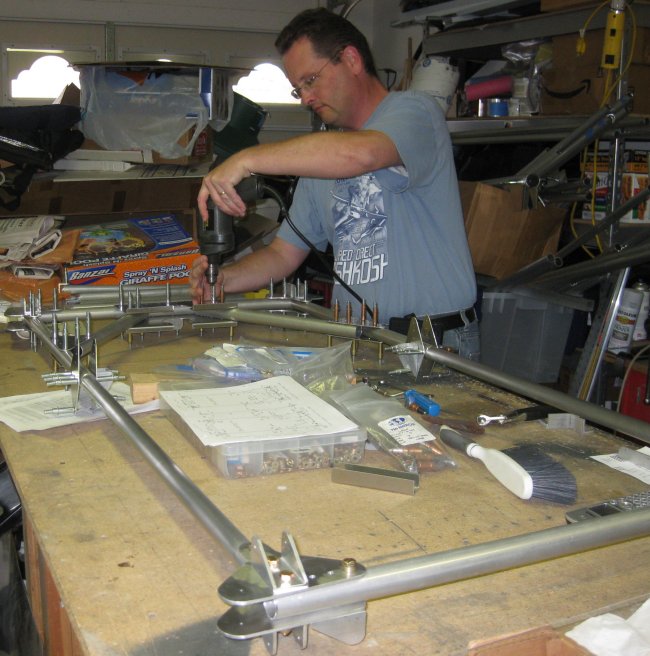
Up-drilling holes in the forward fuselage frame. Yes, that's my 2010 attendee-only AirVenture Oshkosh shirt.
1/4 hr - put the aft frame on the table and flipped the brackets at the bottom to the other side of the frame. No worries - I probably drilled them in the correct locations but assembled them on the reverse side. I put AN3 bolts (temporary - the final fastener is a 3/16 rivet) into the adjacent holes in the brackets and they fit fine. If an AN3 bolt can fit in a #12 drilled hole, a rivet will be no problem.
1/2 hr - finished drilling the area above, plus the joint between the upper and lower vertical tubes on one side. This is where the FB61 needs a little wedge sanded into the forward end to clear the bend in the side bracket. Of course, I did this on one of the FB61's I had made with 3 holes along the bottom flat - the middle hole does not line up with the side bracket. After doing this I saw the FB61 I had clecoed to the other side had only 2 holes, so the 3rd hole could be drilled to align with the side plate. And the other 2 FB61's - I will have to add the 3rd hole to one of them. Though I believe the note in the plans just says the 3rd hole is unused in 2 of the 4 of them - so that would be a lightening hole... Disassembled the side plates, deburred (still need to do inside the two overlapped vertical tubes), reassembled and put the AN3-16A called out in the plans. Looks like another good bolt length.
11/15/11 - Forward fuselage frame
1/4 hr - drilled the side plates halfway up on one side to the vertical tubes, disassembled, deburred, and installed the AN3 bolt that goes across there. This is the other FB61 location that needs a little relief sanded into the under side to sit flush to the plate which has a bend extending under the bracket.
11/16/11 - Tube insert planning
1/4 hr - reviewed the tube insert requirements on plans sheet 6. Made notes as to what the inserts go into. Ran into a friend at work who has a lathe I might be able to use.
11/17/11 - Tube insert planning
1/2 hr - put the tube insert notes into a separate spreadsheet. In looking this over, noted that the same insert part number was called out for 2 different diameter tubes. Corrected the spreadsheet. Went back and calculated total length required - now I don't have enough 1 x .125 tube. Need to figure out what parts I will leave un-done for now.
1/4 hr - looked through the scrap tube box. Found short lengths of each diameter to use for fit-checking the inserts when they are turned.
1/4 hr - Forward fuselage frame - drilled some more of the lower gusset plates in this frame mostly to final size. Severe shortage of 3/16 clecoes...
11/18/11 - Forward fuselage frame
3/4 hr - drilling on this frame is essentially done, until I get/make the angle plates that go on the lower forward U brackets (4 more bolts). Didn't debur yet what I drilled today.
11/19/11 - Forward fuselage frame
1/2 hr - deburred what I drilled yesterday. According to the build book, other than rudder pedal mount brackets (which I don't have), that is all that is installed at this point. But it looks like it might be a good idea to also drill the small channel pieces that go above and below the control torque tube because to debur the FP5 plates that these parts attach to would be more difficult with it all riveted / bolted, and the chips from drilling will go down into an assembly that will quickly be too big to shake chips out of easily.
1/2 hr - make up the .125 doubler plates that fit inside the u-channel brackets that form the attach points for the control stick torque tube. Found some .125 angle stock flange stock that already has a radius in one corner to nest inside the u-channel.
1/4 hr - control torque tube - using the Scotchbrite wheel, polished some minor scratches off the toruqe tube - axial scratches that may have been how the tube was slid in/out of a stack of tubes. Went back over this with a Scotchbrite pad to lessen the shine, then cleaned that with alcohol. For all I know at this point, may end up priming / painting these parts.
11/20/11 - Control torque tube
1/2 hr - drill control stick mount plates to torque tube. Drilled the gusset plates on one end to the stick mount plates. Will finish the rest later, then final size. The mount plates to torque tube take 3/16" rivets, the gusset plates to mount plates take 1/8" rivets.
11/23/11 - A few items arrive
1/4 hr - unpacked a small order from Spruce - 50 3/16 clecoes, 3/4" 6061 rod (goes for tube inserts with a slot to keep the engine mount bolts from rotating as the heads are buried between the forward fuse tubes and the firewall cross beams), a bit of 1.0 x .125 tube, as when I re-calculated I didn't have quite enough (need about 8 feet total), and some AN4-20A (undrilled) bolts. I had used 2 AN4's where the plans showed AN3's. Checked the 3/4 rod slides nicely into the .875 x .063 tube which forms the tube-end insert for those forward fuselage tubes.
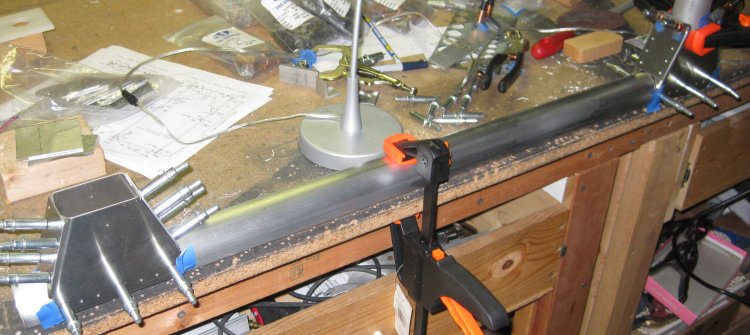
Control torque tube assembly.
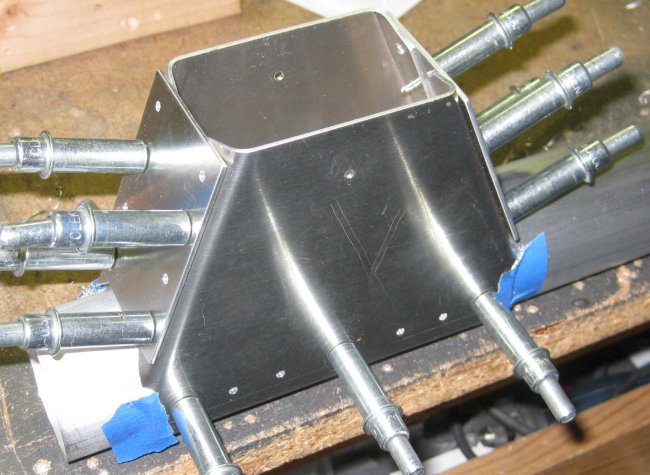
Stick mount / pivot structure, forward end.
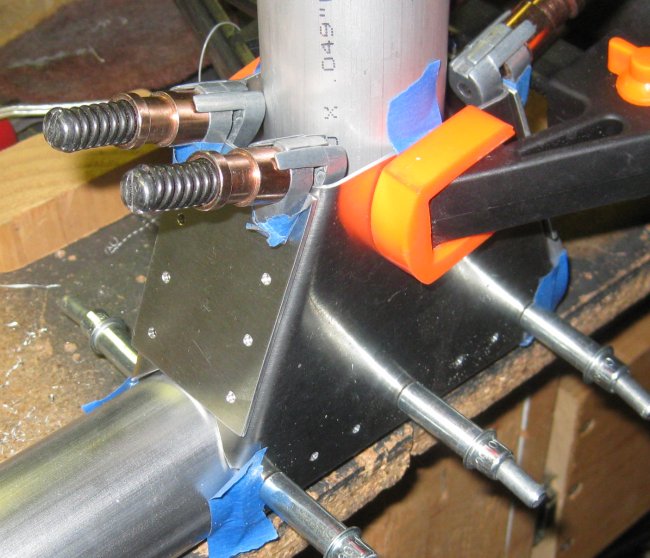
Aft end in process. Scrap of 1.75 dia. tube to inside the assembly to set the spacing of the stick mount plates.
Aft end in process.
11/22/11 - Control torque tube
3/4 hr - drilled this to final size, deburred all, and clecoed back together.
Click to join sherwoodbuilders