1951 Buick Special Deluxe - 14
6/15/2014 - exhaust manifold
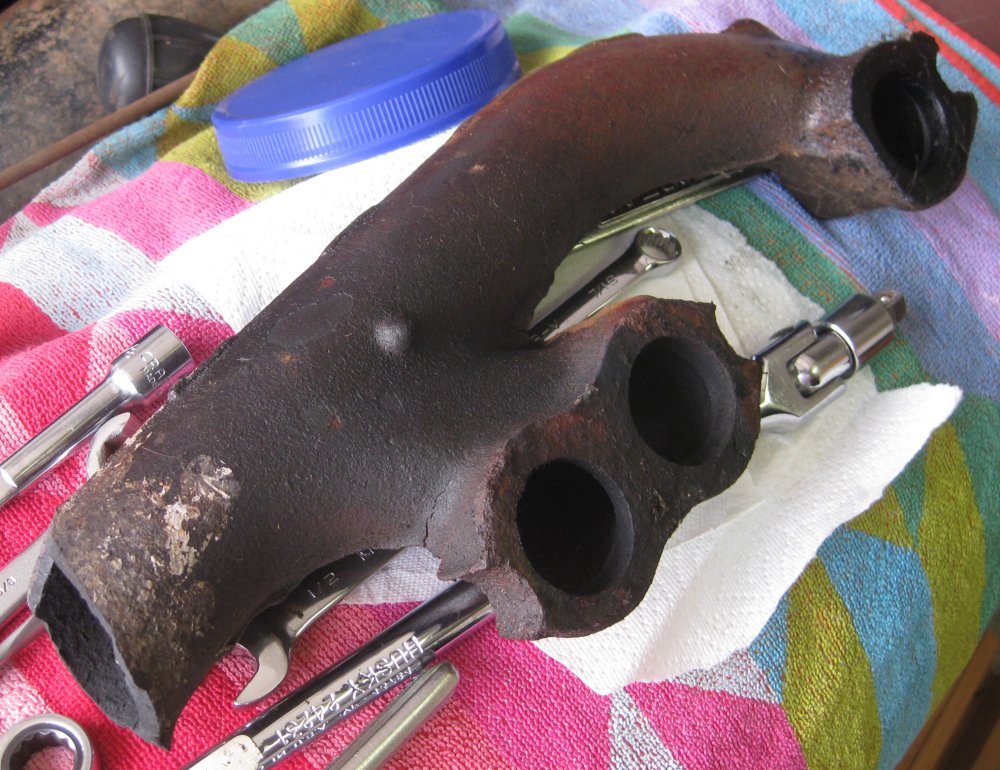
Pulled the intake/exhaust manifold. The studs were coming out of the engine block because the nuts did not break free at all. Not a big deal. There are replacement studs available from various antique car suppliers (and they're probably not all that unusual of a size). I pulled a couple from the front and a couple from the back. At the back, I noticed the exhaust was pulling away from the head more than the intake. So I kept working from back to front, and at maybe the 4th stud, the back third of the exhaust just fell off and fell out the bottom of the car. One recurring story with this car is it had been parked 20 years ago for an exhaust leak. It seems the factory used some sort of ceramic paste or something between the exhaust manifold and the head. Over many years, whatever that was has completely disappeared, and there was maybe 1/16" gap between the manifold and the head. Prior owners may not have known or realized the manifold was so cracked. Anyway, I recall that I've seen these fairly regularly on ebay, so probably easier to get than a radiator. And there are reproductions available (at least I thought there were - catalog I checked had them for the 320 engine, but not the 263 like what I have).
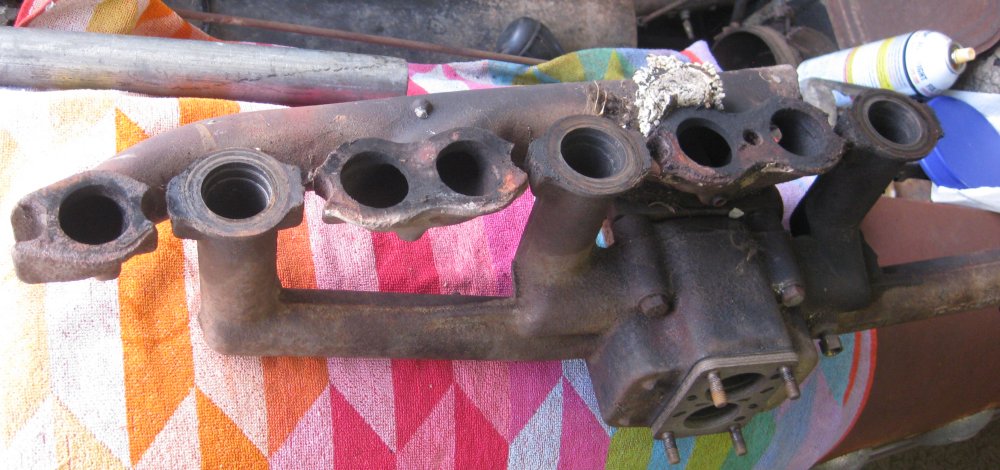
So I posted this on the AACA Buick forum, and within a couple of hours, I got a message to call one of the guys from there. We discussed my situation, and he's going to part with one of what seemed like several that he had to choose from. So unexpected pain and expense, but not near as hard to find as the radiator.
General thought - another guy recently bought a '51 and started posting on the AACA forum. Same kinds of ideas & questions I had - never had a Buick inline 8 - don't know what to modernize or leave alone. I had dreams of disk brakes and air conditioning. But I also want to know what it's like to drive it as it was originally put together. (Another thought I've had that the new guy hasn't posted about yet is transmission conversion. The trans's were evolving very quickly in those days, so it seems like each year has improvements over each prior year. They slip a lot, and generally make the car slower and use more fuel than it would with a more modern trans. But given the torque tube is part of the rear suspension, it would be a major piece of work to either adapt a new trans and build a new rear suspension, or adapt a new trans and make some sort of adapter to retain the existing rear suspension. Either way, I want to drive this the way it is to see what these transmissions were like.) But continuing the general thought - this car is the lowest-cost body style in the line. It's the 2nd to lowest trim level. It's not particularly rare or sought-after. So it's not economical to spend a bunch of money bringing it to a high level of restoration. My thought now is keep the drivetrain original because I don't put a lot of miles on these old cars going to a couple of shows and a bunch of cruise nights anyway, and do a simple external respray to make it look better. I'll drive it in the existing patina for a while, but I was thinking of a flat metallic green with white top. The wheels would be the original red. Not sure about hubcaps. The existing wheels don't have the brackets for the poverty dog-dish caps - they are set up for the full-diameter caps. So maybe run it without hubcaps to show more of the red.
6/17-18/2014 - other items
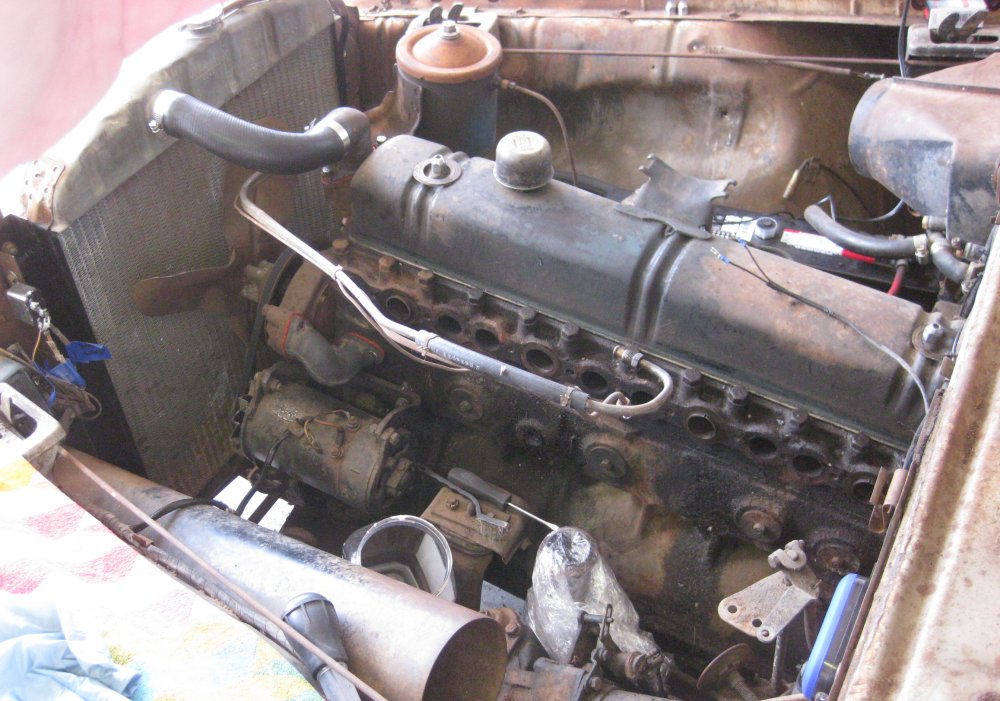
While waiting for a replacement manifold, other items can be checked. The brake lights worked initially, but gave up on their own. Trying to diagnose this. The view of the fuse panel in the manual is all turned around from how it is in the car, so it took a bit to decide which way is up. And just the view of the panel in the manual doesn't do a whole lot to say what's connected to what, since there are tracks inside it that connect things together. With that and the wiring diagram, I found the wire that goes out to the brake lights. I jumpered that to hot with a screwdriver and wrench and could see the lights go on. So the back portion of the wiring is good. Tried both leads at the brake light switch - cold. So the open is possibly between the fuse panel and the brake light switch. I haven't checked out the switch itself, but with neither wire hot there, the switch isn't necessarily a problem. Still haven't found exactly which lead OFF the fuse panel is TO the brake light switch. I can see it in the diagram, but the panel is so far up under the dash I haven't figured out how to get a test lead (to a buzz box circuit tester) up to the right spot. I might have to take the panel loose.
Another item - Ben mentioned to clean up the head, especially at the exhaust ports. At the inlet ports, there are rings that slip into the head and into the manifold, so the surface-to-surface isn't all that important. I found I had some emery cloth of different grit sizes, so I put that on a small sanding block and ran that over the exhaust ports. Ben mentioned if I pull the head off, have a machine shop skim the side along the exhaust ports - but on some of the ports, the casting appears to be not quite all there around the ports. So cleaning off the built-up grit and whatever it is that remains of the exhaust sealant has left a surface that looks reasonably good for a new gasket.