1955 Buick Special Custom - 04
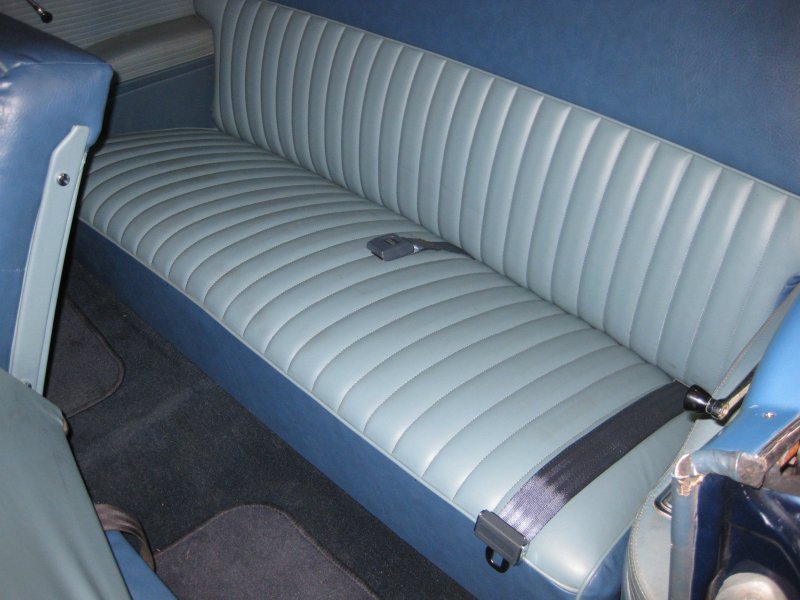
4/22/13 - seat belts
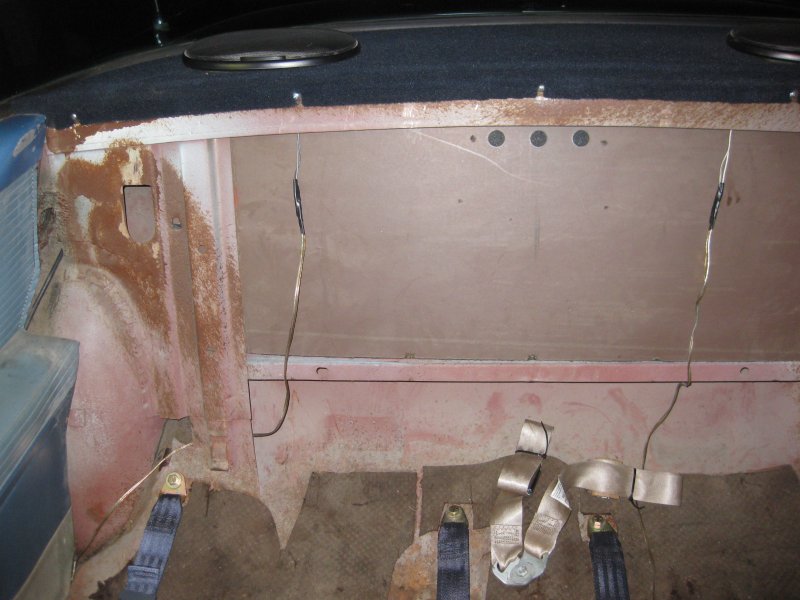
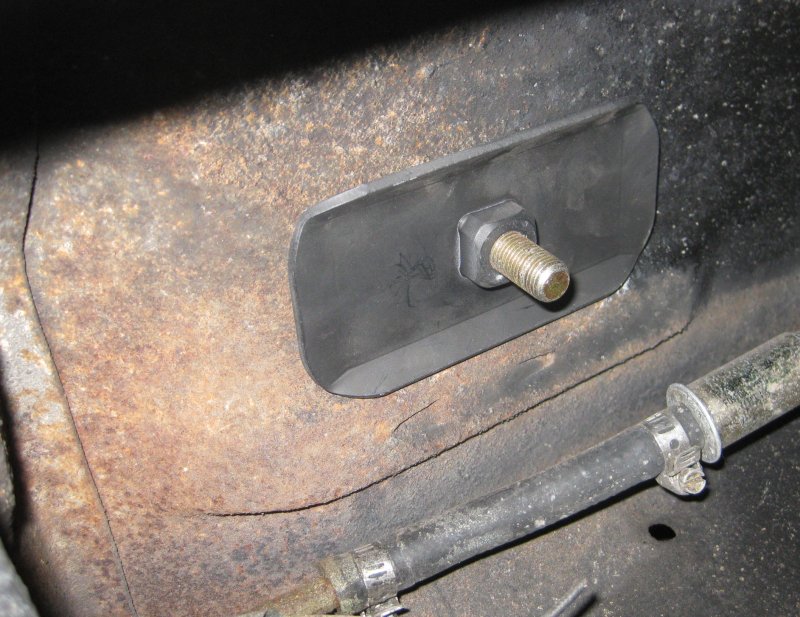
Belts from Juliano's arrived today. Pulled out the back seat bottom. Sized up where the belts should go. Figured out that the outboard belt can attach between the wheel well and the seat back structure. Felt around under there, and this ends up between the frame and body. There's a big gap between frame and body at that point. There is a brake line up under there (though this is a more recently added brake line - I'm not sure where the stock lines would be). Drilled a 1/8" starter hole - if it's wrong, dab of sealant and try again somewhere else... Put the shop light over the hole and looked up from under the car - great spot for a seat belt. Brought the hole up to 7/16" with the unibit.
Sized up the center end of the belt - should be a couple of inches farther back than the old belt that was in there. Looked up under the car - looks like nothing but empty flat floor back there. Drilled the hole. Cut back the insulation mat around each belt attach point. Carol came out to wind the bolts in while I held up the fastener plates from below. Put the seat in - fits really nice. That's enough for today. May be able to finish off the back seat tomorrow.
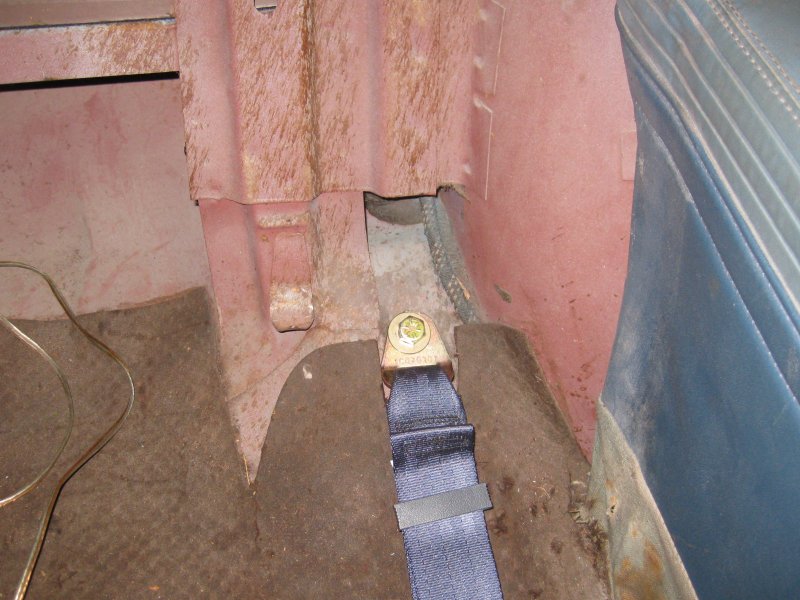
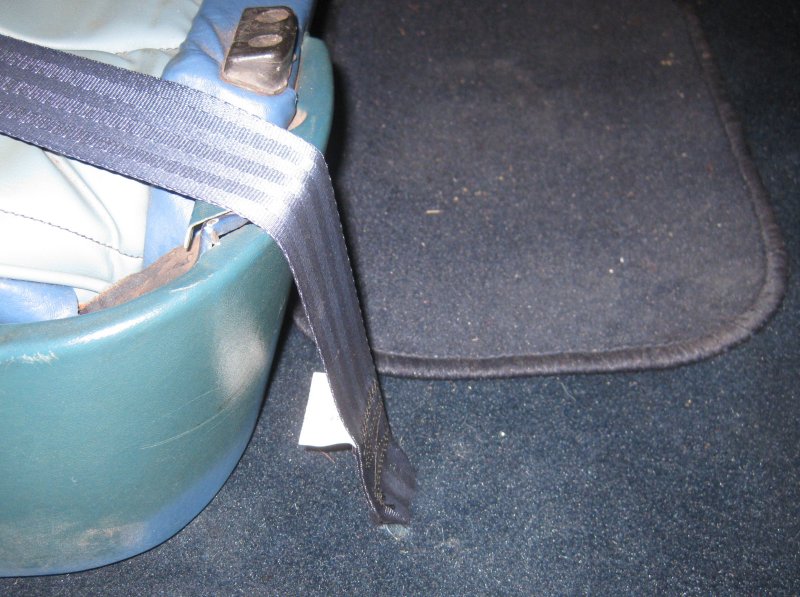
Outboard belt attach point between wheel well and seat back mounting structure.
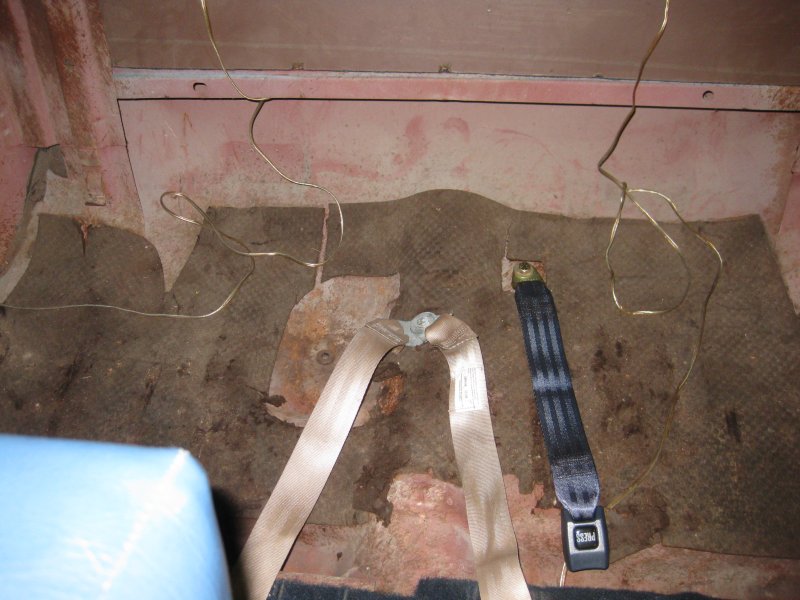
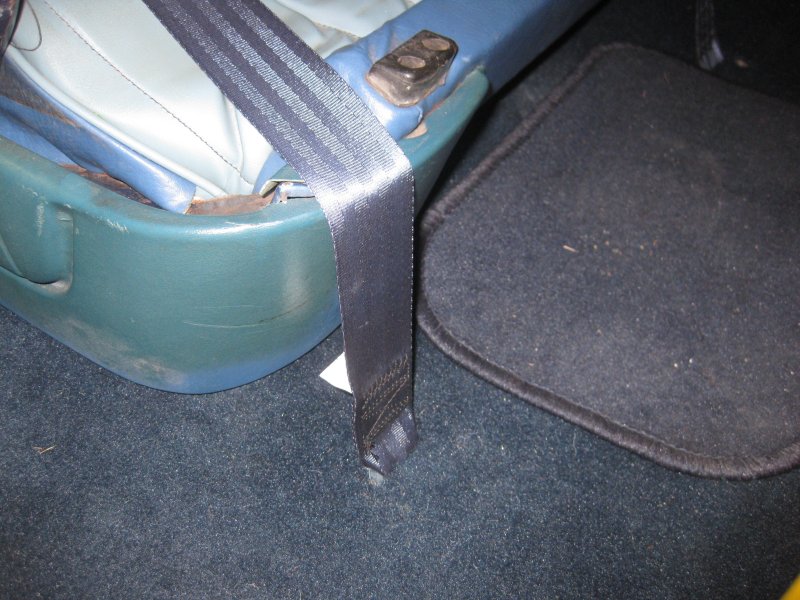
Inboard belt attach point. Yes, those lazy wires are for the speakers. Came that way!
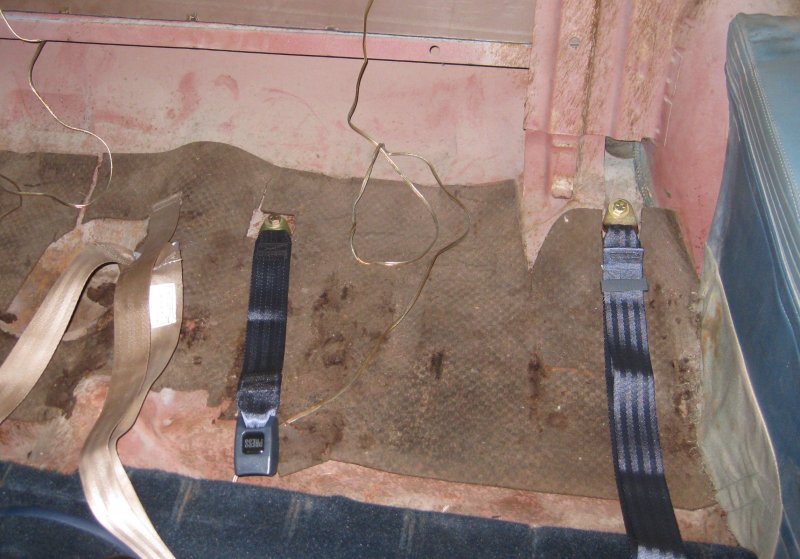
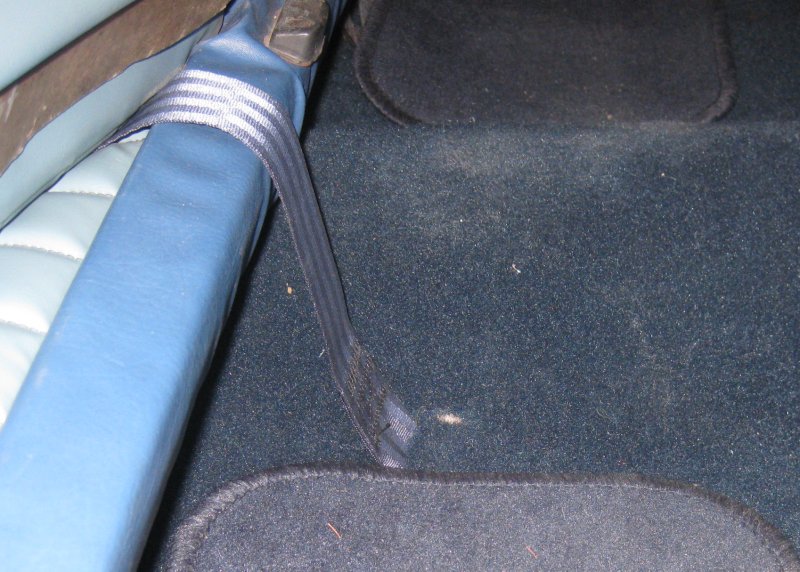
Both belt points - these are just about right on 18" apart. About as close together as you want to go.
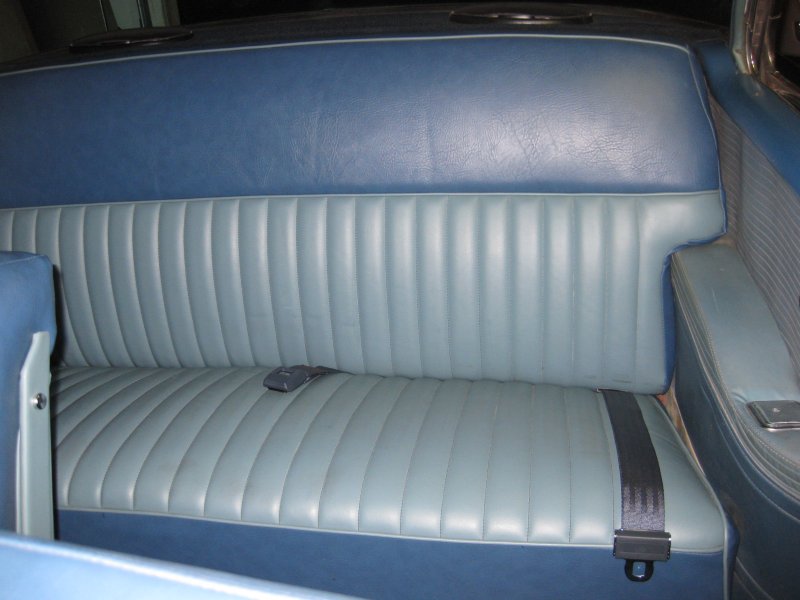
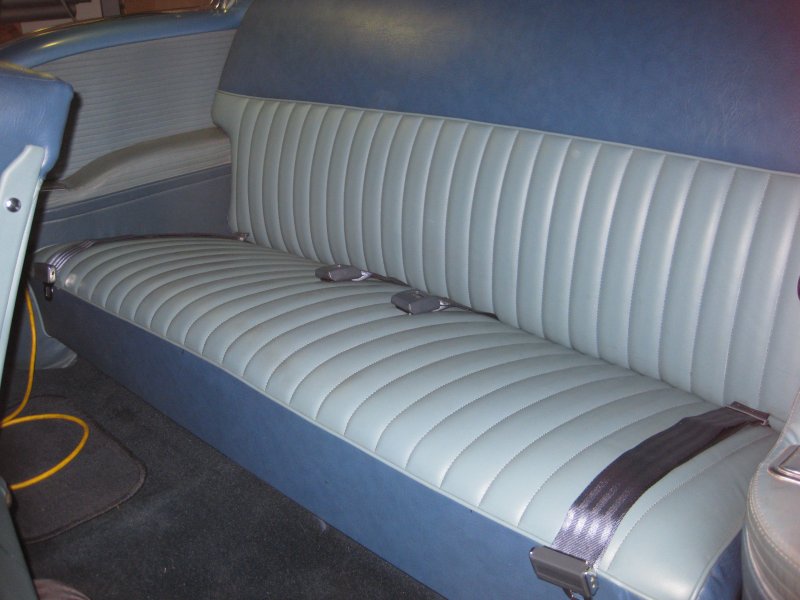
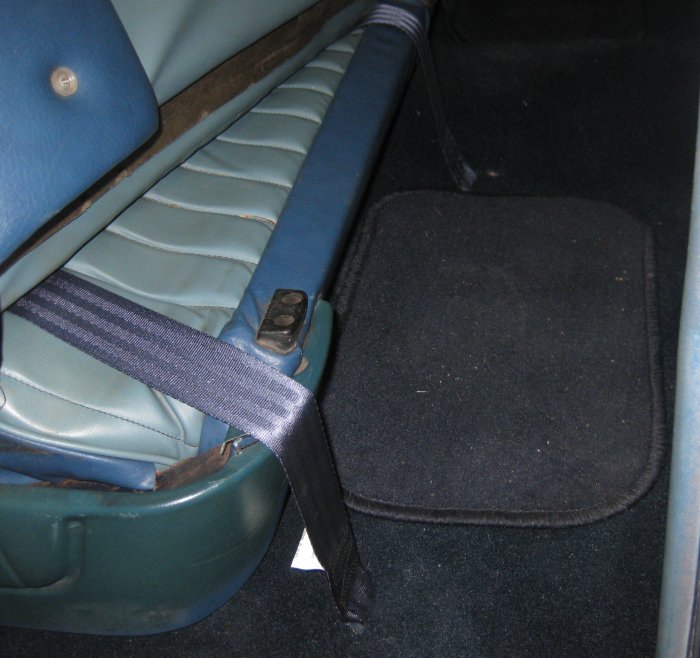
Seat back in. Sweet! Belts look like they kinda clash with the color... but wait for it...
Color works nice with the carpet, even if it's not all that great with the seat. And it's a heck of a lot better than that gold belt that was in there...
4/23/13 - seat belts
Got the second rear seat belt installed. Rolled up and cable-tied the old seat belt, so it's still in there if needed. Took about 18" out of each speaker wire and soldered the leads. They were twisted and wrapped with electrical tape. Primed and painted the seat belt backing plates. Did the 6 that were not installed, and when it was time to tighten down the 2nd rear belt, removed the unpainted plates from the first belt and replaced with painted. Will paint that last pair later.
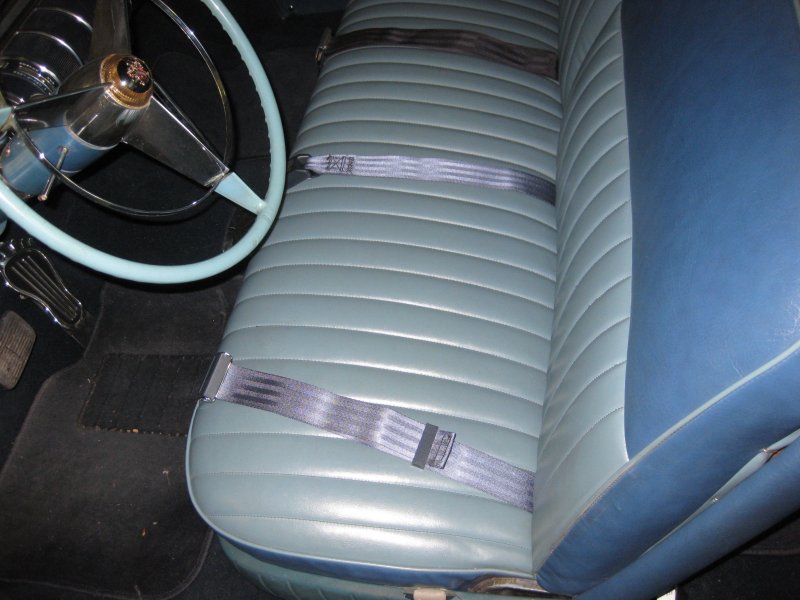
Cleaned up the speaker wires. Still finished with electrical tape, but there's heat shrink sleeve under that. Right center belt had to go slightly farther back than the left side one due to the small well in the floor.
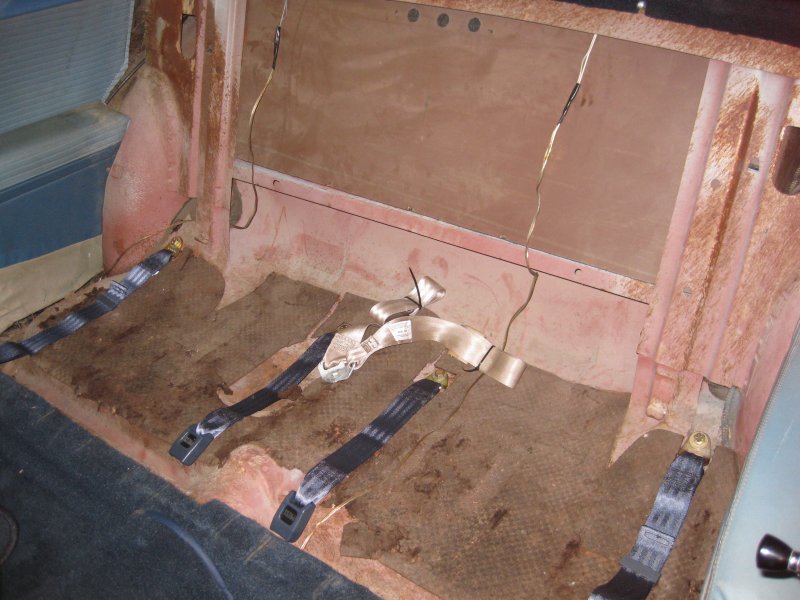
The new belts in position. Left the old belt in there just in case.
This is just what I had in mind.
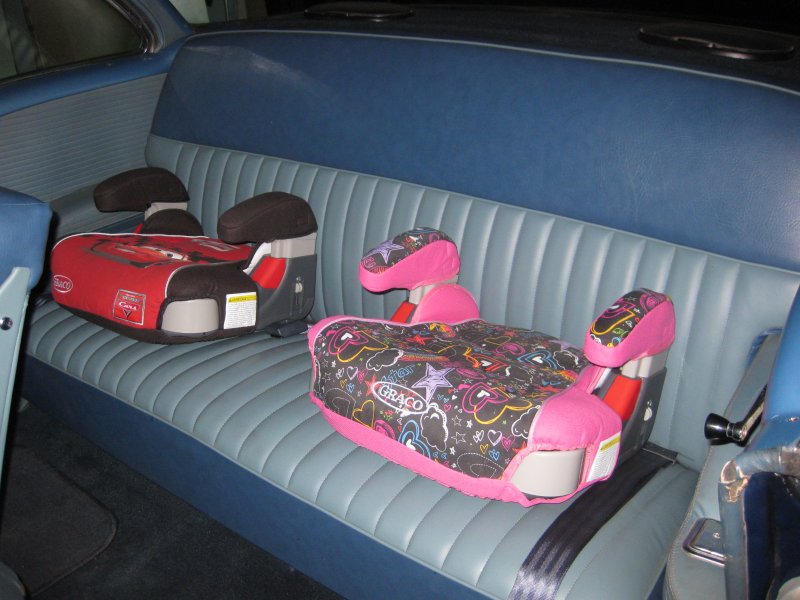
Spacing is just perfect for these little guys. I know a booster seat doesn't make these lap belts safer, but the boosters let them see better...
4/26/13 - couple more things
Painted the final pair of seat belt backing washers. Was looking online at photos for seatbelt installs. Looks like some just bolt over top of the carpet. I was thinking about maybe a slice in the carpet to put the fastener plate through. Still not sure. Took Carol & the kids out for ice cream after dinner. Evan couldn't help but mess with the window crank, which doesn't work so well on the right side. It starts to slip after the 2nd of 3 turns in the up direction. Have to go real gentle and help the glass up. A little later - looks like the radiator is still a little leaky at top center. Not sure if that's the cap or something in the core that just happens to be in the center. Cleaned off the stainless fan shroud. That looks a lot better. Loosened the upper grille surround as it contacts the hood right in the center. As I thought, there is some adjustment possible, so I pulled it forwards a little. No more contact with the hood, though the hood paint is chipped right there in the middle. Pulled out a non-functional radiator overflow can. That was heavier than I thought it would be. Figured out that yes, there are hoses going back to a heater on the right side. Not sure how or if it can be turned on, but I won't be needing heat for a while. Big show next weekend. Might try to make it if I can get this trans weep cleaned up.
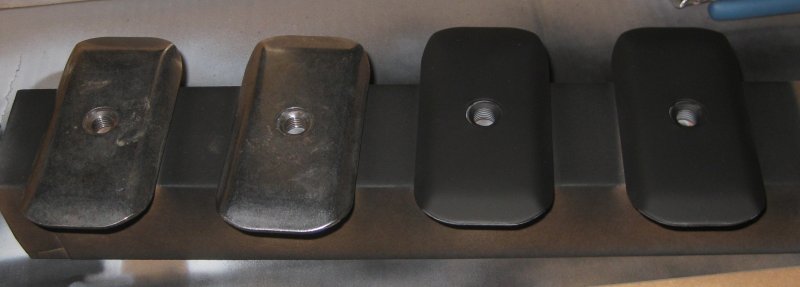
The under-floor seat belt backing plates.
4/27/13 - front belt
Got the driver's seat belt installed. Looking at the back of the seat, I thought I would locate the belt relative to seat features. Not so. The belt is located relative to features in the floor. There's a bunch of little stiffening ribs and such pressed into it, so the belt went where it went. As far forward as the washers would allow, and it ended up with about 21" between the attach points, which is right in the middle of the 18-24" range that I found a recommendation for. Actually, I think 24" would be a bit on the huge side, and that might really apply if using a stiff-arm that mounts completely outboard of the seat itself.
Anyway, the how-to. Put the car up on a jack stand in front of the rear wheel, because drilling and bolt access is needed from below. Drilled the pilot holes from below, stuck a drill bit in the hole to feel the hole location in the carpet, cut a slice about an inch forward of the hole location (scaled it off the bend location in the belt bracket) and about an inch to either side. Then sliced back in a U shape to either side of the hole to make a little flap in the carpet. Cut out the carpet pad - that is tough stuff. Found the belt bracket would not sit tight to the floor, so cut a forward-folding flap maybe 1/2" to access the carpet pad forward of the belt bracket and cut that out. Then drilled the holes to final size from above using the unibit. Deburred the outboard hole. Installed the belts. The inboard hole position is actually defined by where the under-floor washer rides up against a rubber plug that is already in the floor. Anyway, after folding the carpet flaps back down, I think it turned out really well. Will get some adhesive to stick the carpet to the belt brackets, and that should do it.
The finished product - driver's seat belts.
Trying to show that the belt backing plate is nestled up against a stiffening rib pressed into the floor pan. Have to base the choice of location on what is below the floor.
Driver's seat, outboard belt location.
Driver's seat, outboard belt location. If someone had challenged me to bury the belt fitting under the carpet, I couldn't have done it. But by not trying too hard, I think it turned out really nice.
Driver's seat, inboard belt location. A little fuzz still to clean up there.
Driver's seat, both belt locations.
Same day, other expensive adventures. Took it to the tire shop. Got the tires replaced with BFG Radial T/A's, white letters out. 235/70 R15's. They found spacers under the rims - between the rim and the brake drums, and they were not of a type they were willing to reinstall the wheels. Only about a quarter-inch thickness each, so I told them to just leave them out. Sure, someone may have been trying to fill the wheel wells a little more, but they went on about thread engagement. Well, I know thread engagement, and that's not a problem, but I'd rather not have spacers in there myself. Anyway, with no spacers on the fronts, the center caps don't clear the bearing dust covers. That may have been the real origin of the spacers. So I told them to leave the center caps off the front wheels. I'll figure out something for that later.
Next expensive stop - a transmission specialist for that drippy trans. I was able to wait there for about an hour, and just after being picked up they call and ask if I want to come back. I said no, I believe them. They wanted me to see that it's not just leaking from the bottom pan but all over. So they are going to drop the trans and re-seal everything. That shouldn't mean a total rebuild because it seemed to be driving and shifing just fine, though I'm not sure exactly what it's supposed to shift like. They are going to keep it over the weekend. Not sure if they work on Sunday and aren't open to the public, or if it's really a Monday job. Big show next Saturday. Was trying to make it with this car, but if it's not ready/safe, I'll just go as a spectator.
Given that the car is out of the garage, I went and cleaned out the hangar and put that stuff in the car's space. Needed to do that anyway, as I had the hangar paid until the end of this month. Not that Steve would give me a hard time about the little bit of stuff I had out there, but I'd rather just get that closed out and done.
4/29/13 - Transmission
Found out that transmissions are more expensive than I thought... Anyway, it's being rebuilt today. They expect it back tomorrow, and the car back to me on Wednesday. I stopped by there after work to look under the bottom of the car and talk to them about what they see. Got a good tip on the speedometer - the right shop for that around here. So I'll give that a try.

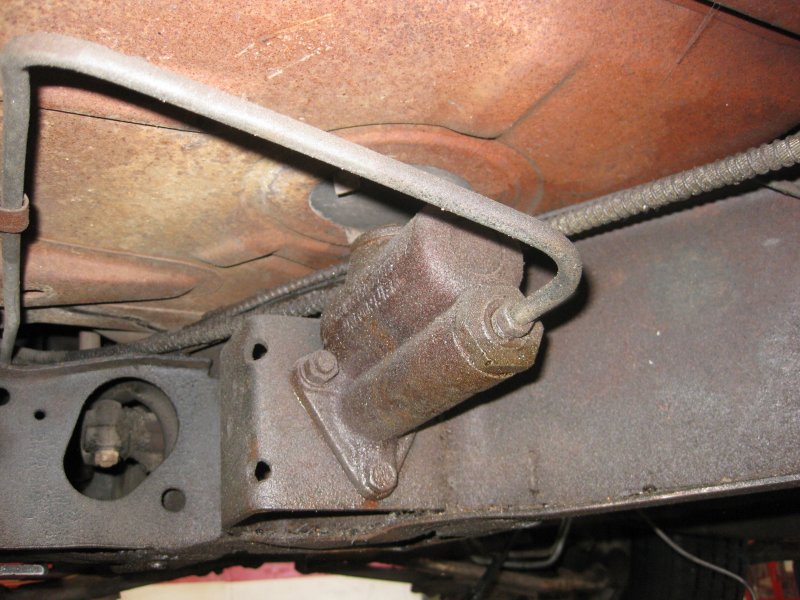
While it was up, got some photos for possible future use. This is behind the engine, where the trans goes.
Brake master cylinder. It's under the floor, just ahead of the front seat.
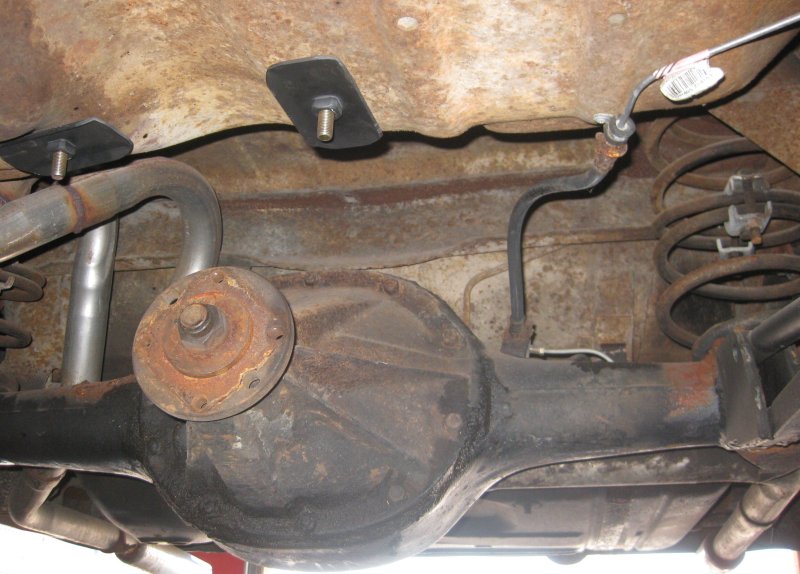
Rear axle. Also can see the clean black backing plates for the back seat seat belts.
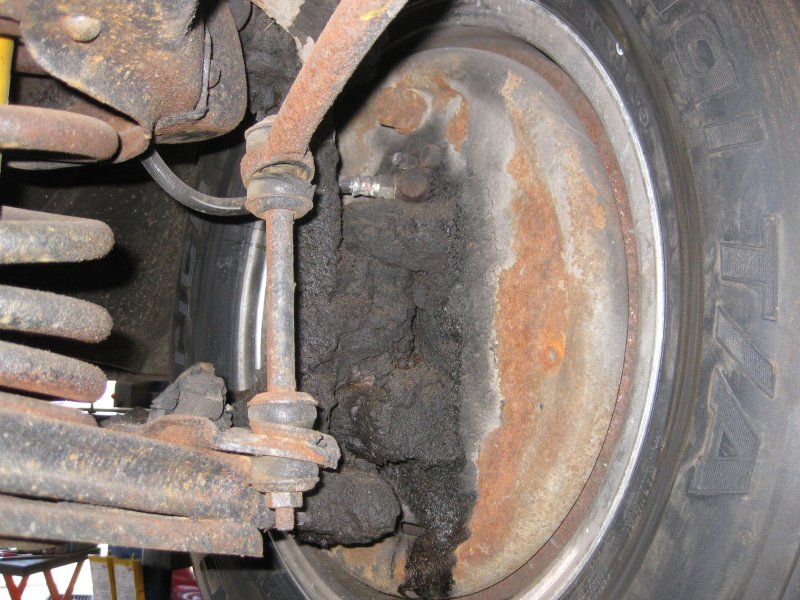
Left front wheel. A little grease to clean off there someday.
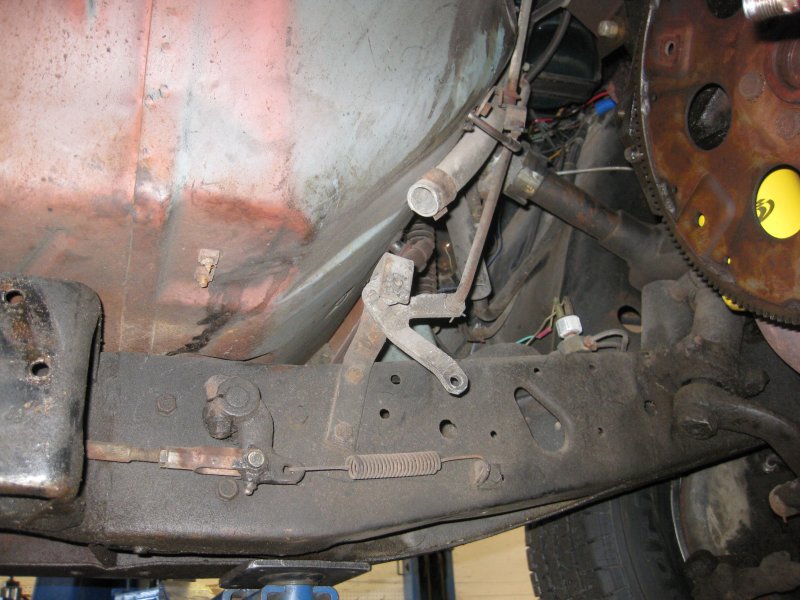
Remainder of the original column shifter.
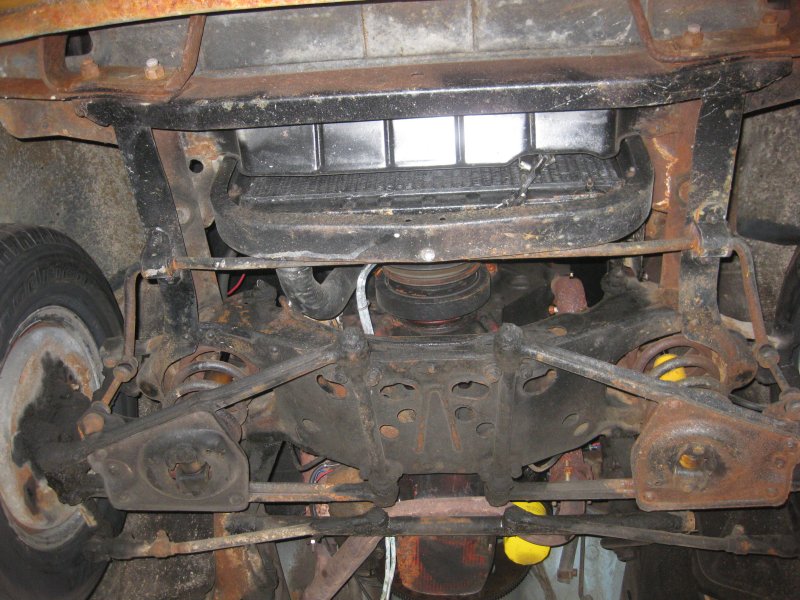
Under the front center.
5/3/13 - Got the car back
Not sure exactly what all went on there, as the above said I'd get it back Wednesday. Anyway, it seems like the trans was back to their shop maybe a day later than expected, than a bit longer to get it back in. When in towards the end of Thursday, they got an oil leak out of the back of the oil pan. It was pretty significant. It did occur to me that there might have been something going on with what was done with the trans, because there was no oil leak when I brought it in, but it's just another day. So I had them pull the pan, and they recommended doing the rear main seal at the same time. So there's that. And I said, since it's an oil change anyway, may as well change the oil filter. And they recommended changing the speedometer cable because it was not in good shape at the trans end (at some point it got twisted?). So another day, another $500.
Got it back Friday, getting near closing time for them. But no more trans seepage in my garage. There were a few drips of oil, which better be from the pan pull (I could see oil on the cross member under the engine.
Tasks for the car show - get the front hub covers on the front wheels. Went to Ace Hotrod Supply (Hardware) and found some nylon spacers and longer screws just like the ones already used for the hub covers. That worked out just right. Ok, so the covers are 3/16" off the wheel, but I don't think it's very noticeable. So one problem solved.
Next item - the 4th seat belt pair. Took a while, but got that installed. The little rubber plug on the right side was not in the same place relative to the floor pan as on the left side, so I just cut it off and removed it. The seatbelt backing plate covers that hole. Overall the front seat seatbelt installations turned out pretty good. Gave the floors a quick vac and the wheels a quick wipe off (still need a more thorough polishing), but that's about it for preparing for the show tomorrow.